

Painting textured walls and ceilings can be a bit of a challenge – and maybe they’re not your favorite surfaces to tackle. But with the right prep work, tools, and techniques, guess what? You CAN create a smooth and professional-looking finish. Whether you're tackling a rough brick wall or a popcorn ceiling, here’s how to get the job done right.
Step 1: Clean Your Surface Like a Pro
Before you even think about opening a paint can, prep your surface! Dust, dirt, and peeling paint will sabotage your final look, so take the time to clean things up. Here’s how:
- Use a stiff-bristle brush or a broom to sweep away loose debris.
- For exterior or brick walls, a jet or power washer will blast off built-up grime and pollution.
- If you’re working inside, a damp cloth or vacuum with a brush attachment can help remove dust from textured surfaces.
And don’t forget — give the spiders an eviction notice before you start!
Step 2: Prime for a Smooth Finish
Primer is your best friend, especially if you're painting raw brick or a previously unpainted surface. Why? Because brick dust has a sneaky way of working its way into your paint and changing the color, so a high-quality stain-blocking primer is a must.
Pro tip: Lightly misting the wall with water before applying primer can help it absorb into all the nooks and crannies. It’ll thin out the coverage a bit, but since a second coat is usually needed anyway, it’s worth the tradeoff for a better bond.
Step 3: Mark Out Your Design Without the Headache
If you’re painting a design or a mural, think through how you’ll mark out your shapes and lines. Regular chalk can be tricky because it tends to cling to textured surfaces (hello, stubborn brick grooves!). Instead, try a water-soluble chalk or a white charcoal pencil for easier cleanup.
When using tape for clean lines:
- Apply it firmly, but know that textured surfaces make it tough to get a perfect seal.
- Always brush away from the tape edge, rather than pushing paint toward it, to avoid seepage.
- A Zibra Cut-In brush is perfect for getting crisp edges without needing to rely too much on tape.
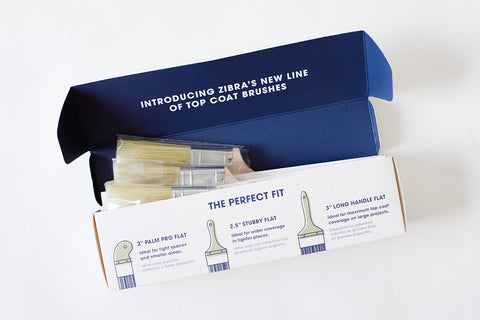
Step 4: Use the Right Brush for the Job
When it’s finally time to paint, using the right tools makes all the difference. Textured surfaces demand brushes that can get into all the crevices while still giving you control over the finish.
- For Brick & Rough Surfaces: The Zibra Round Brush is perfect for getting paint into every dip and groove without overloading the surface.
- For Ceilings & Textured Drywall: A Zibra Fan Brush allows for smooth coverage without excess drips.
- For Cut-Ins & Edges:The Zibra Square Brush gives you crisp, clean lines, which is ideal for working around trim and corners.
Step 5: Protect Your Work with Aftercare
Once your masterpiece is complete, protect it!
- If you’re painting an exterior surface, use a UV-resistant paint to keep your colors vibrant for longer.
- If graffiti is a concern, consider an anti-graffiti coating so you can easily wipe away unwanted tags.
- A final rinse (especially on brick) can help remove any leftover chalk lines or dust from the painting process.
Ready to Transform Your Walls?
Painting on textured walls and ceilings may take a little extra effort, but with the right prep and Zibra brushes in hand, you'll get a finish that looks pro-level. Grab your brushes, pick your colors, and get painting!
When your project is complete and you’re ready to thoroughly clean your brushes, use soap, water, and the Zibra Paintbrush Cleaning Tool to remove any paint residue. Proper maintenance ensures your brushes remain in top condition for future projects.
And don’t forget to share your projects with us on social media, using @zibrapainting and inspire others on their painting journey! Want more tips and tricks? Sign up for our mailing list. Happy painting!

