Step 1: Choose Your Surface and Design
Before you begin, select a suitable surface for your mural. Common options include interior and exterior walls, fences, and even ceilings. Once you've chosen your surface, decide on a design that complements the space and reflects your artistic vision. Consider factors such as the size of the wall, the surrounding décor, and the theme you want to convey.
Step 2: Gather Your Materials
Next, gather all the materials you'll need for your mural painting project. This may include:
Primer
Paintbrushes
Paint palette
Acrylic or latex paint in assorted colors
Paint trays
Painter's tape
Drop cloths or plastic sheeting
Sketching materials (pencils, erasers, rulers, etc.)
Reference images or sketches of your design
Step 3: Prepare the Surface
Prepare the surface of your chosen wall by cleaning it thoroughly and applying a coat of primer. This will help the paint adhere better and ensure a smoother finish. Use painter's tape to mask off any areas you don't want to paint, such as baseboards, trim, or windows. Lay down drop cloths or plastic sheeting to protect the surrounding area from paint splatters.
Step 4: Transfer Your Design
Once the surface is prepped, transfer your mural design onto the wall using sketching materials. You can freehand your design directly onto the wall or use a projector to project an image onto the surface for tracing. Take your time during this step to ensure accuracy and proportionality.
Step 5: Start Painting
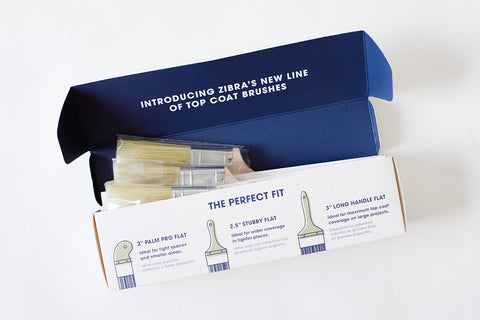
With your design in place, it's time to start painting! Begin by outlining your design with a small paintbrush and the base colors of your mural. For these types of projects, we love the Zibra Round Paaintbrush or Zibra Square Paintbrush. Use lighter colors as a base layer and gradually build up the colors and details as you go. Experiment with different brush strokes and techniques to achieve the desired effects.
Step 6: Add Depth and Detail
As you progress, add depth and dimension to your mural by layering different shades and highlights. Use smaller brushes, like the new Zibra Artist Brush Set for intricate details and fine lines, and larger brushes, like the Zibra Palm Pro Paintbrush for broader strokes and background areas. Take breaks as needed to step back and assess your progress from a distance.
Step 7: Refine and Finalize
Once the main elements of your mural are in place, take the time to refine and finalize the details. Touch up any areas that need extra attention, and make any necessary adjustments to ensure a cohesive composition. Don't be afraid to experiment and let your creativity flow!
Step 8: Seal and Protect
Once your mural is complete and dry, consider applying a clear sealant or varnish to protect the surface and enhance the colors. This will help preserve your artwork and ensure it withstands the test of time. Stand back and admire your masterpiece – you've successfully painted a mural!
Step 9: Clean Your Brushes
After painting, clean your brushes with soap, water, and the Zibra Paintbrush Cleaning Tool to remove any paint residue. Proper maintenance ensures your brushes remain in top condition for future projects.
Congratulations! You've mastered the art of painting murals. Don’t forget to share your projects with us on social media, using @zibrapainting and inspire others on their painting journey! Want more tips and tricks? Sign up for our mailing list. Happy painting!


